
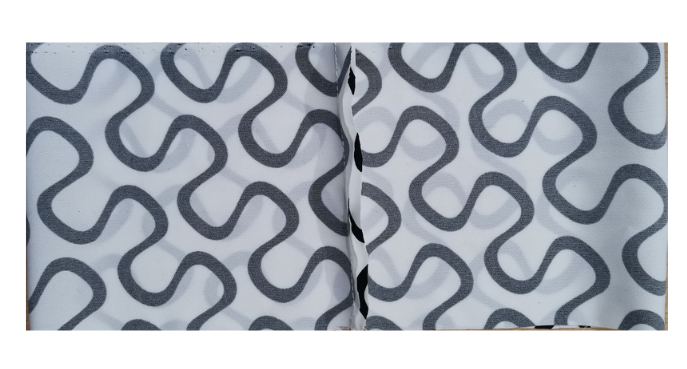
The measurements provided are meant as a guide. You can easily adjust the length and width to explore different-sized scrunchies. As for the fabric, each type gives a slightly different look. Velvet, for example, gives a fuller look. Fabrics that provide volume are great for scrunchies with short to medium bunny ears, a knot, or a small bow.
You can use many types of fabric (e.g., satin, silk, velvet, corduroy, polyester, cotton). The best beginner-friendly type of fabric is quilting cotton.Now, let’s make 3 different kinds of scrunchies!
You will need:
- 6-8inches elastic (6mm size)
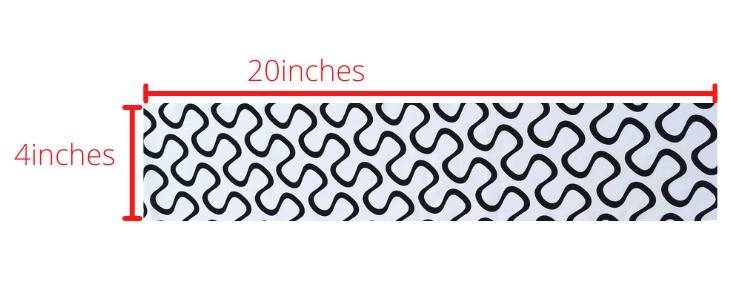
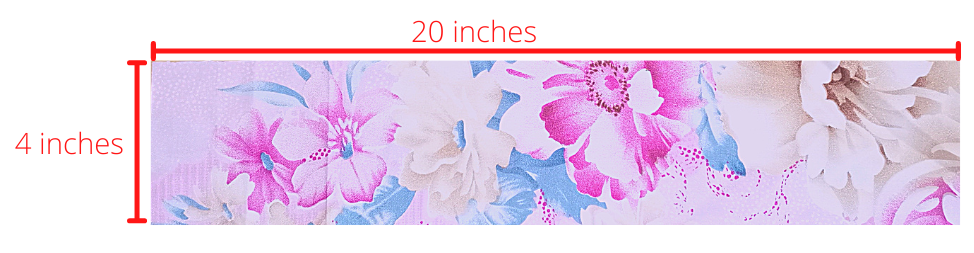
- 4×20 inches of fabric (2.5inches or 3inches, or 3.5inches for smaller sized scrunchies; 35 or more inches for a fuller/more ruffled scrunchie)
- Medium size safety pin or a turning tool
- Pins or clips
- Scissors or rotary cutter if available
- Cutting board (Optional)
- Needle with matching thread (if hand-sewing is preferred)
- Sewing machine, needle, and matching thread
Method 1 Instructions:
1. Lay the fabric flat, wrong side down.
2. Fold right sides together and make the short ends meet and sew leaving a 1/4 seam allowance. Now you have a round piece of fabric.
3. Lay it flat right sides together and the stitched short side in the middle.
4. Now, you have 2 layers of fabric.
5. Pick the edges of the upper layer and gather them in the center.
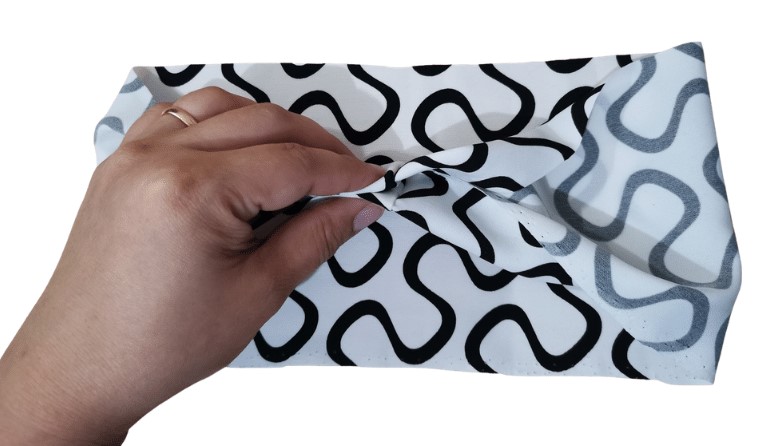
6. Pick the lower layer and match the edges. Pin them to secure. 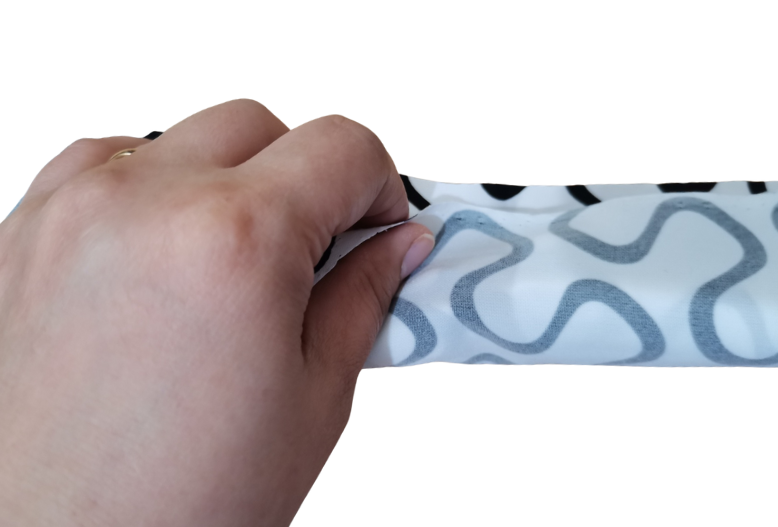
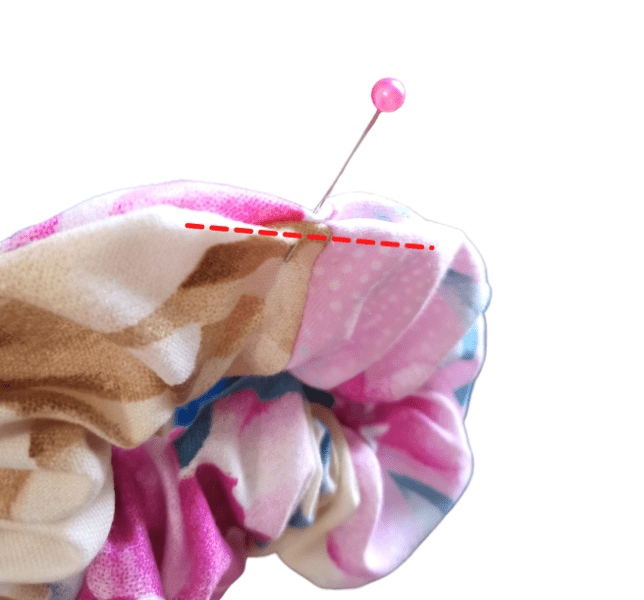
7. Sew along the side leaving 1/4inch seam allowance; keep pulling to expose more fabric, making sure you are sewing only the 2 layers of the outer fabric. When you reach the seam (in step 2), spread it to prevent bulk.

8. Leave a gap for inserting the elastic.
9. Turn right side out and insert the elastic.
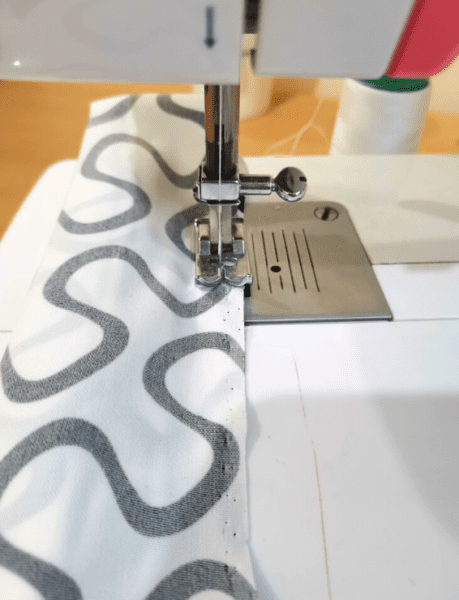
10. Gather the ends of the elastic, make a knot (or sew) to secure the elastic and close the gap with a topstitch.
11.Well done! Now you have a basic crunchie.
Method 2 Instructions:
- Cut your fabric.
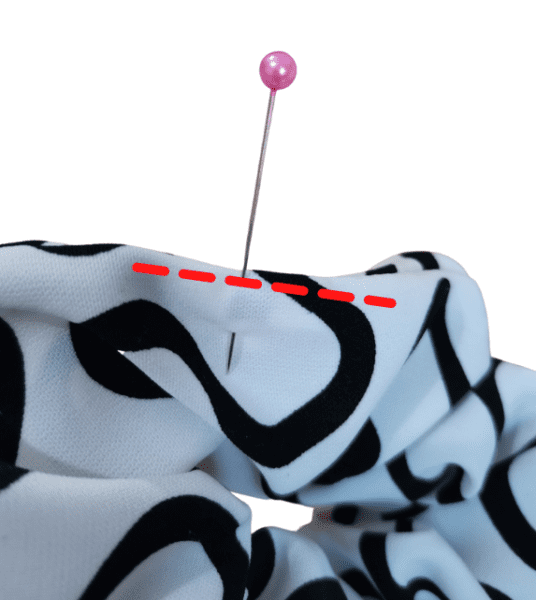
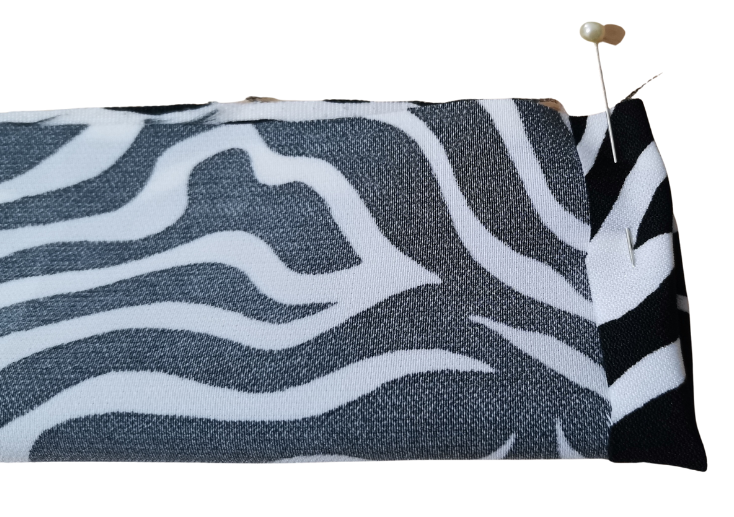
2. Fold the strip of fabric right sides together, place pins 2 inches from the short edges and sew as shown.
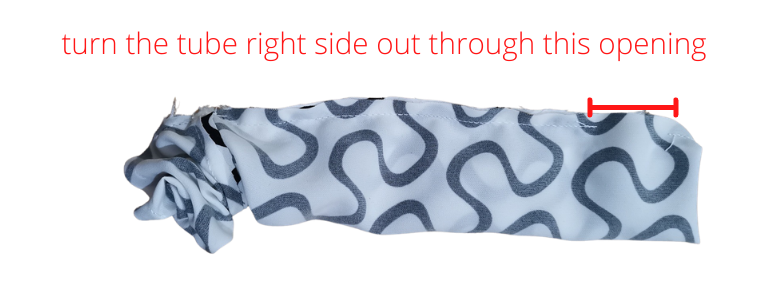
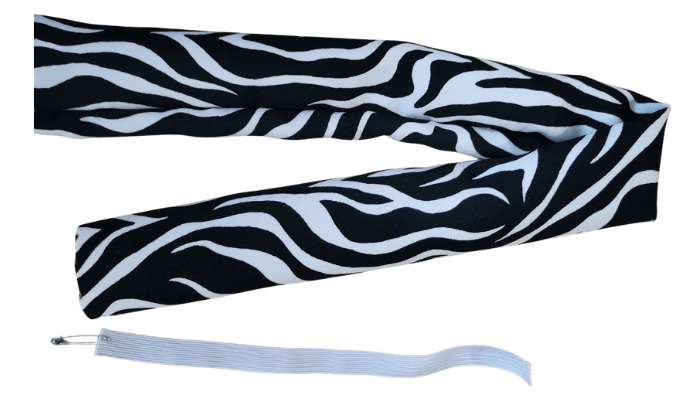
3. Attach a safety pin to one end and turn the tube right side out.
4. Match the short ends of the fabric, right sides together, pin and sew along the edge.

5. You now have a circular tube.
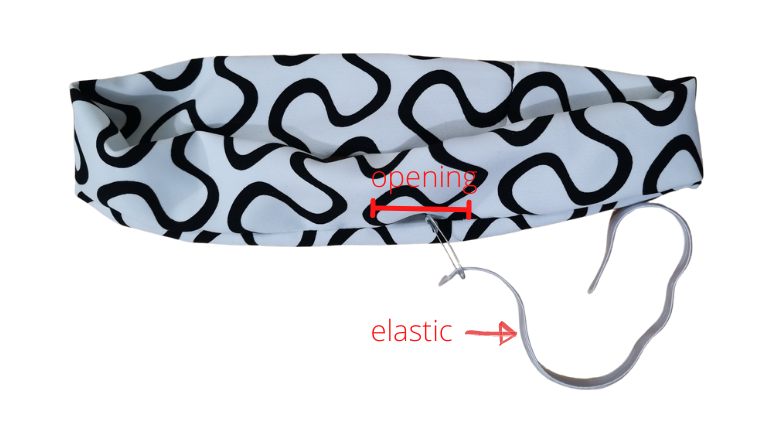
6. Attach a safety pin to one end of the elastic and insert into the tube, while holding the other end of the elastic.
7. Gather the ends of the elastic and make a knot. Alternatively, sew the ends of the elastic together using your sewing machine or by hand. If you are using a sewing machine, it is easier to sew along the grain of the elastic
8. Fold the edges of the opening, pin and do a topstitch close to the edge.
9. Your scrunchie is done!
Method 3-Instructions:
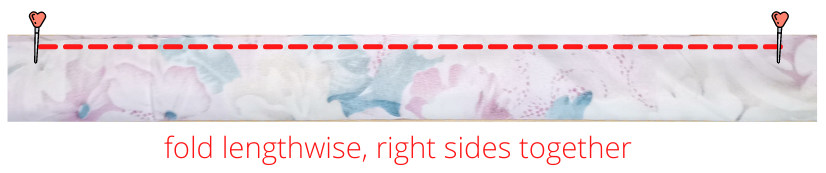
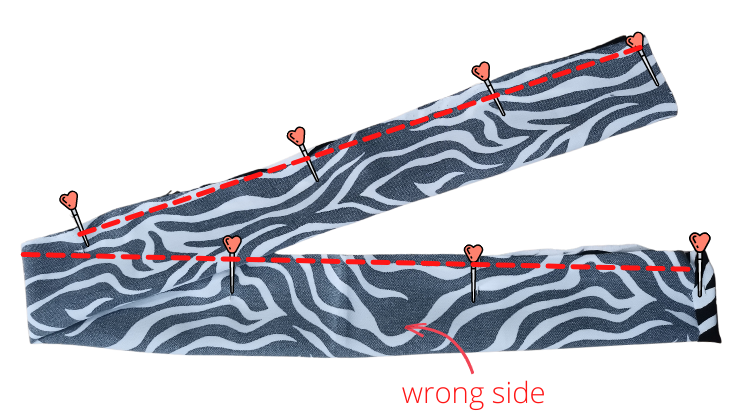
1. Fold lengthwise right sides together. To one end, fold about 1/2 inch towards the wrong side and sew down the long edge.
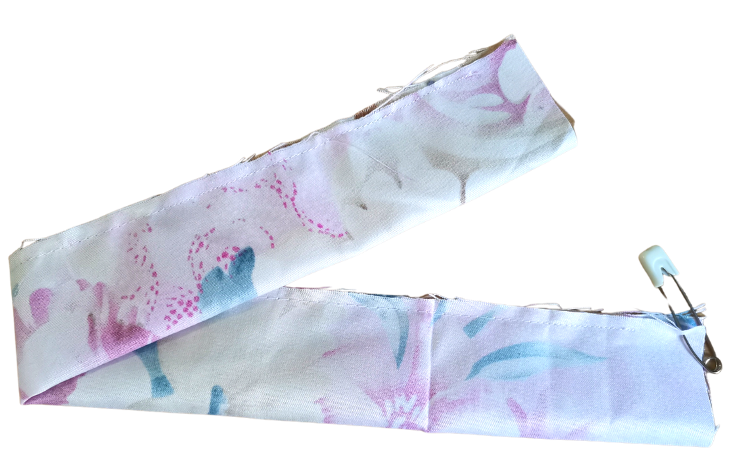
2. Attach a safety pin to one end and insert the pin through the tube to turn the tube right side out. Remove the safety pin after.
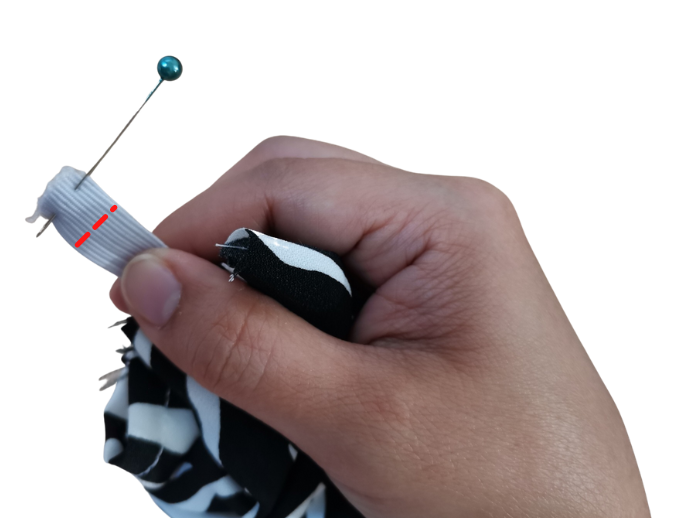
3. Attach a safety pin to an elastic. Insert the elastic through the opening. Use the safety pin as your guide, thread it through the tube.
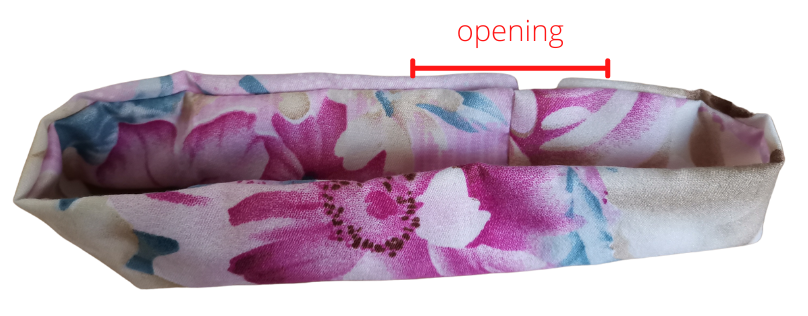
4. Gather the ends of the elastic and make a knot or sew the ends of the elastic together. This time I did not use my sewing machine. I hand-sewn the two elastics together, trim the extra length and it worked well, too.
6. Bring the edges of the fabric together. Insert the raw edge inside the opposite folded edge. Make a ladder stitch to close the opening.
7. Alternatively, secure the edges with a pin, make a straight stitch across 3 layers (fabric, elastic, fabric). Backstitch at the beginning and end.
8. Well done! You have just finished making 3 different kinds of scrunchies!

My personal favorite is method number two. However, I have seen many thriving and successful small home businesses making scrunchies by the hundreds using methods 1 and 3.
Choose your style! If you get to discover a faster, better, more professional way to make a basic scrunchie, let me know.
And how do you actually wear a scrunchie? There are at least 8 different ways!
Pingback: THE 12 THINGS YOU NEED TO START SEWING - Our Yellow Haus
Pingback: HOW TO SEW A HAIR TOWEL WRAP - Our Yellow Haus