

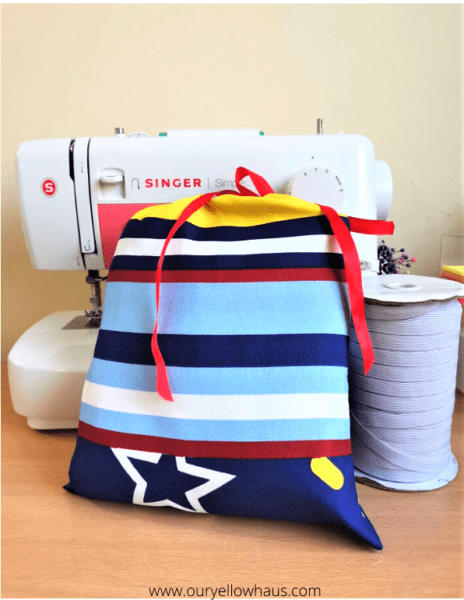
Making this easy project will give you the confidence to tackle your sewing machine. Easy, quick, and very useful.
You can quickly make this to color coordinate your living room, fill the sofa, add coziness to your bedroom, add more fun to the kid’s play area, and so on. All in all, a small project with huge benefits.

I could say that the measurements of a pillowcase are flexible. Pillowcases are a beginner’s best friend.
If you are going to sell it, stick to the standard measurements though.😊
You will need:
- Scissors
- Measuring tape
- Fabric
- Sewing Machine, needle, thread
Fabric measurement:
Determine the size of your pillow’s length and width.
Cut the fabric at the same width and length measurement. You may add or remove an inch depending on the fit that you are going for.
Example: Length of your pillow x2 and add 8 inches for the overlap and seam allowance. I usually make 20×30 inches for the pillows that we have around the house.
Instructions:
To the short side of your fabric, fold about 1/2 an inch and then fold again and sew along the edge to create a finished edge. Do the same to the other side.
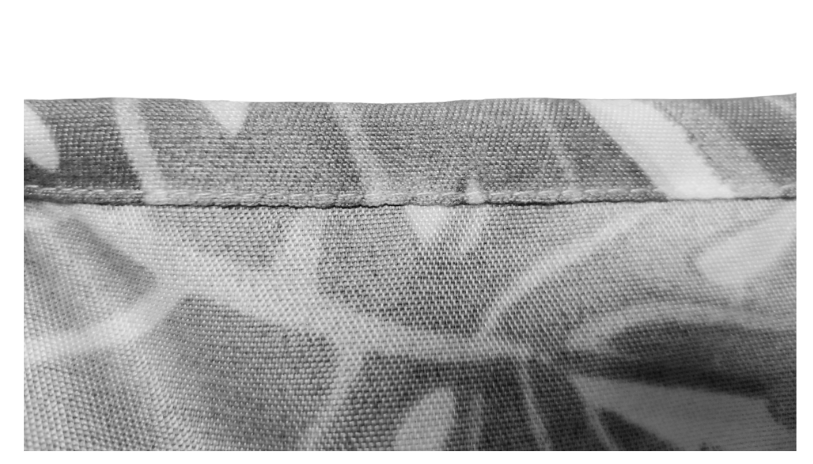
Sometimes I fold about 1/2 inch, sew near the raw edge, fold again and sew. It would look like this:
Here are two ways to finish the pillow cover:
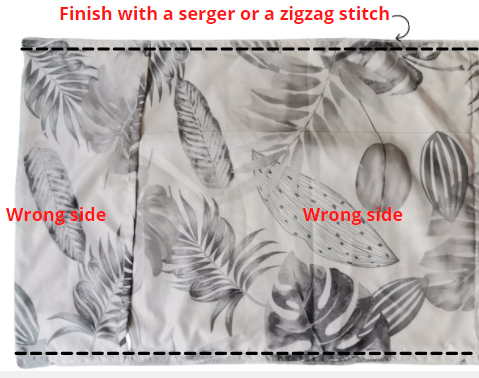
2A. Zigzag the raw edge (I assume you do not own a serger as a beginner):
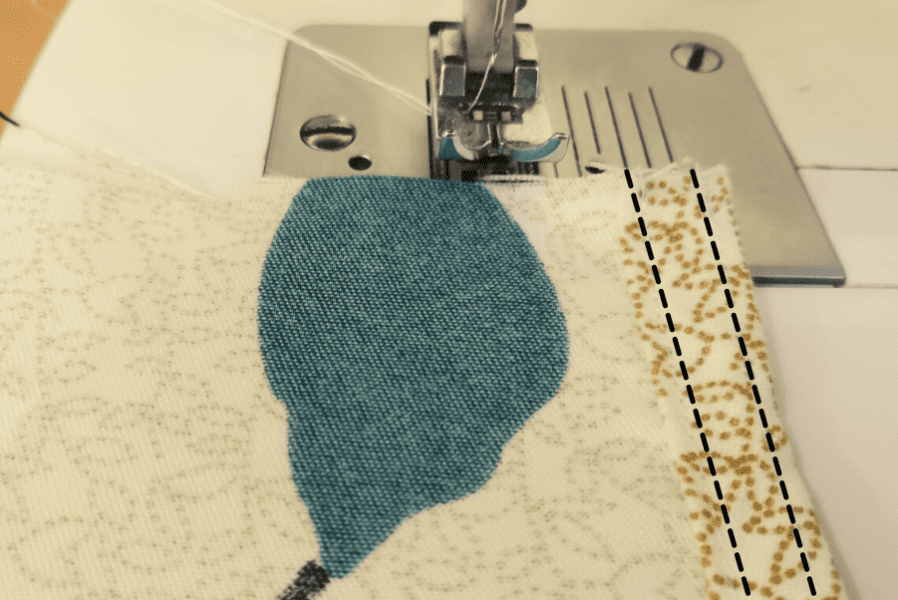
Fold your fabric, right sides together according to the length of your pillow. Fold the overlap on top and sew along the sides as shown.
Turn your pillowcase inside out and you are done. That’s a sewing project that involves a two-step process.
2B. The French Seam :
Fold your fabric wrong sides together, according to the length of your pillow.
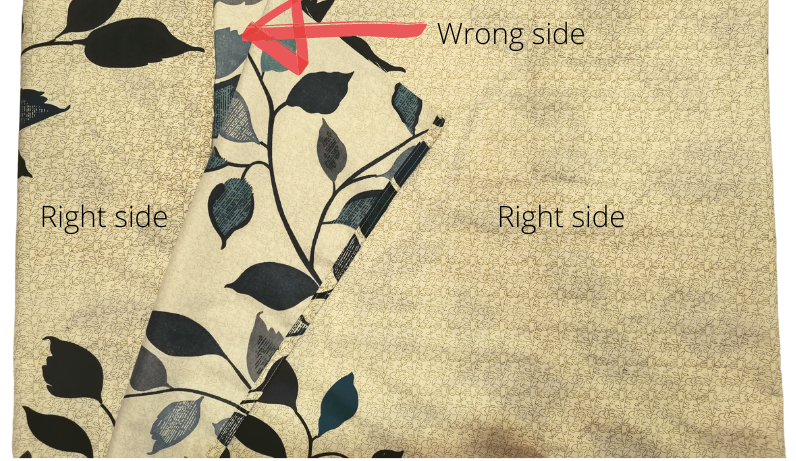
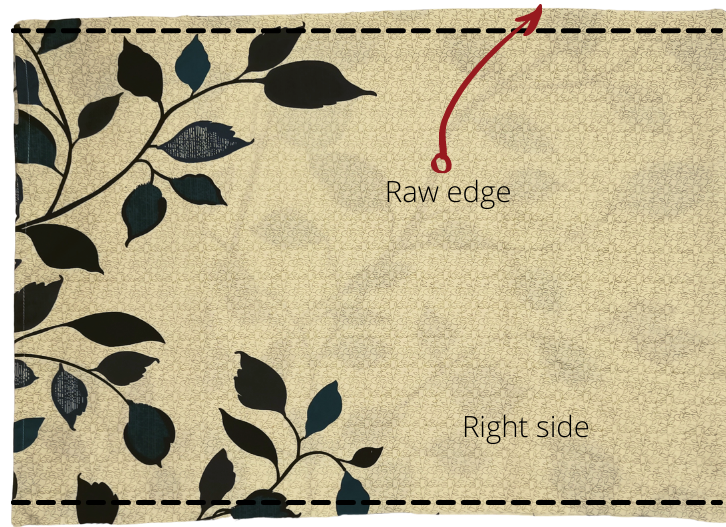
Fold in the overlap as the middle layer.
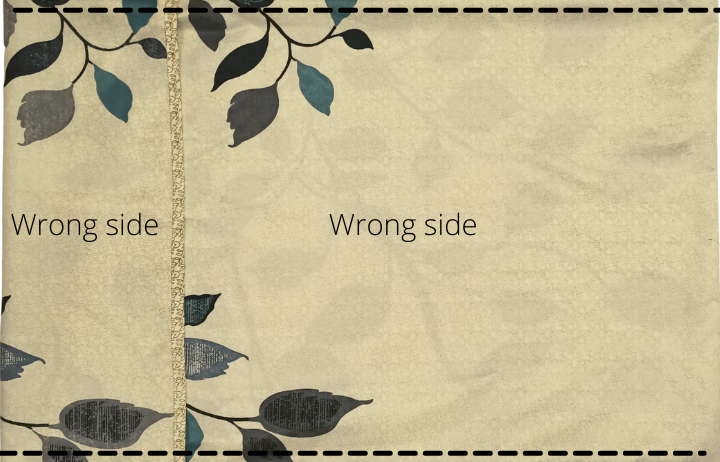
Sew the long sides leaving a ¼ seam allowance. Trim raw, frayed edge. Finish this step with a seam allowance of less than ¼ inch.
Turn your pillowcase wrong side out and sew as shown. Remember that this step should trap the raw edge inside.
Again, turn your pillow right side out. Poke the corners for a neat look. Done!

I hope you enjoyed making your pillowcase. Are you feeling confident to tackle another project? Try making a fitted sheet next. I know you will enjoy making it, too.

Pingback: MAKE ENVELOPE CLOSURE PILLOW CASES - Two ways - Our Yellow Haus