
Warning: This post can change your morning and evening self-care routine.
Yes, I know you do not have the time to wrap and unwrap your hair every time the loose ends of the towel unravel while your hands are doing 5 different tasks. Using this hair towel wrap during your skincare routine (or spa) keeps your hair in place and without a doubt will help your self-care routine less frustrating.
Why sew a hair towel wrap?
This simple sewing tutorial takes a beginner less than half an hour. After 3 easy sewing steps, you can make yourself a hair towel wrap.
Also, this does not require so much skills. (The good thing about sewing is that you do not wait until you have advanced skills to benefit from it.) With basic skills, you can already accomplish a small sewing project that is useful enough to be used every day.
Let’s make it!
Top Tips on how to make a hair towel wrap:
1. Choose a 100/16 needle size. I am using the Universal 90/14 needle size in most of my sewing projects and I tried that same size on my towel and it did good.
2. Increase the stitch length. I used 4.
3. Clean your sewing machine immediately. The shedding will cause thread or needle jam later when left unattended.
4. I have a shoulder length hair so I measured and cut the length at 30″. If your hair is much longer, adjust accordingly.
5. No sewing machine? NO problem. THIS CAN BE HAND-SEWN. Instead of a zigzag, Do an overcast stitch to secure the edges and prevent it from unraveling.
You will need:
- Absorbent or microfiber bath towel (old or new)
- 3-inch elastic
- Sewing machine and matching thread
- Hand-sewing needle to sew the button on
- Scissors and straight pins
- Big button
Instructions:
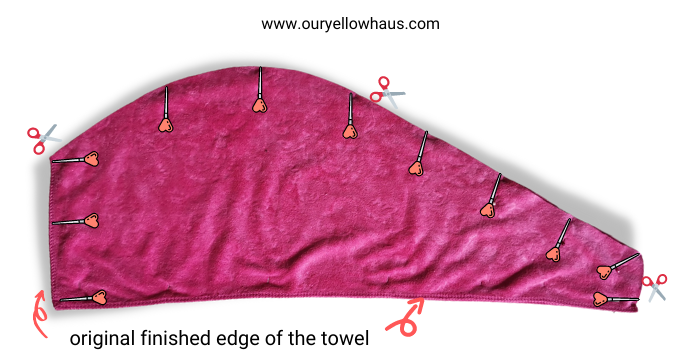
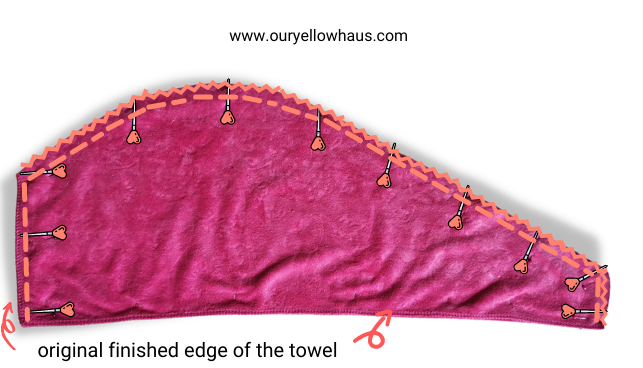
Fold your towel lengthwise, right sides together. Mark the towel according to the measurements shown below. The top is the fold and the lower part should be the original finished edge of the towel.
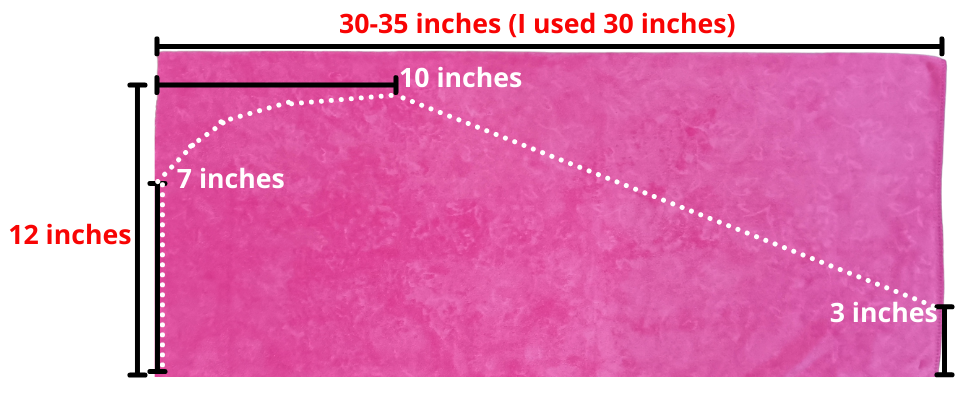
Next, use lots of pins to keep the two layers in place. Cut the curve and tapered end. (Notice that the left side which is 7inches in length is a finished edge and doesn’t need to be cut.)
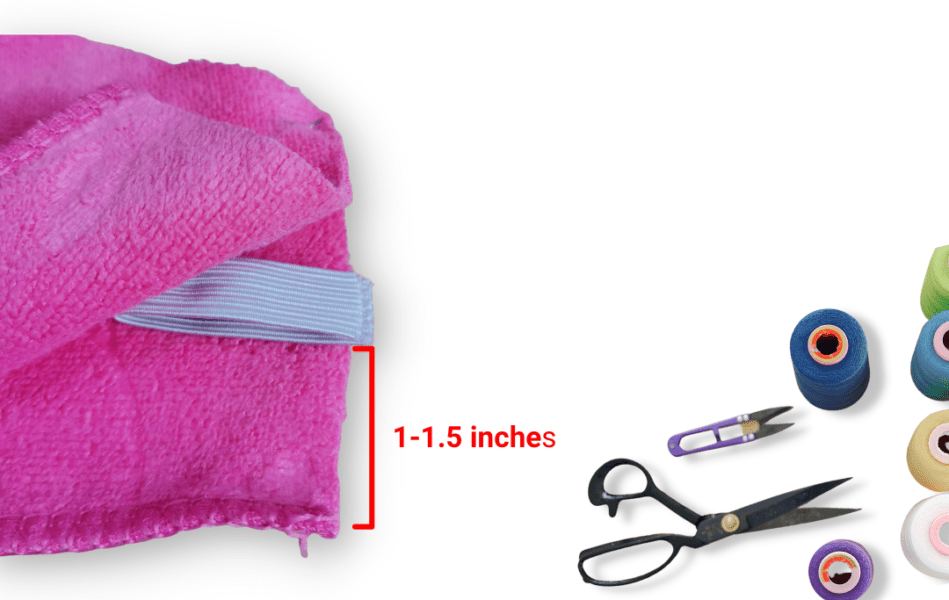
Fold the elastic and insert 1-1.5 inches away from the finished edge (tapered end). Align the raw edges of the towel and the elastic. Pin it in place.
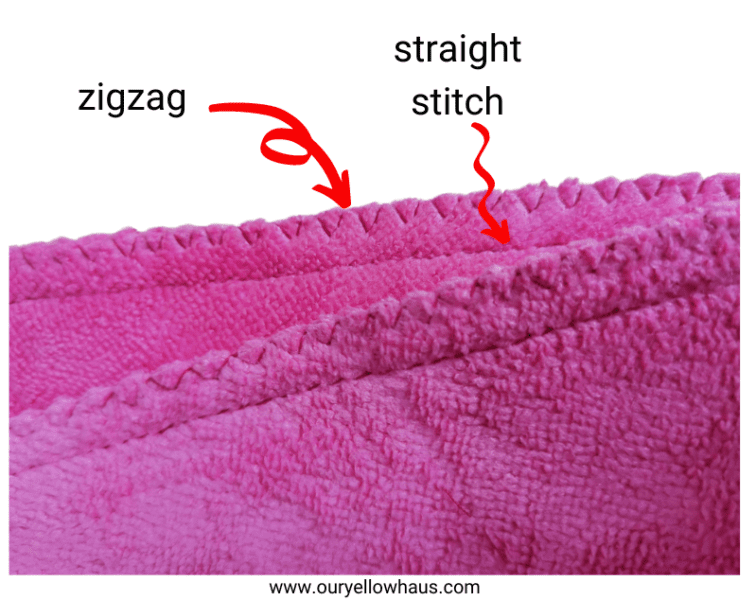
Do a zigzag stitch to the curved side and down to the right side (tapered end). Again, if your left side is not a finished edge, do a zigzag as well.
Do a straight stitch from the left, and top (curve) and the tapered end, leaving a 1/4 seam allowance.
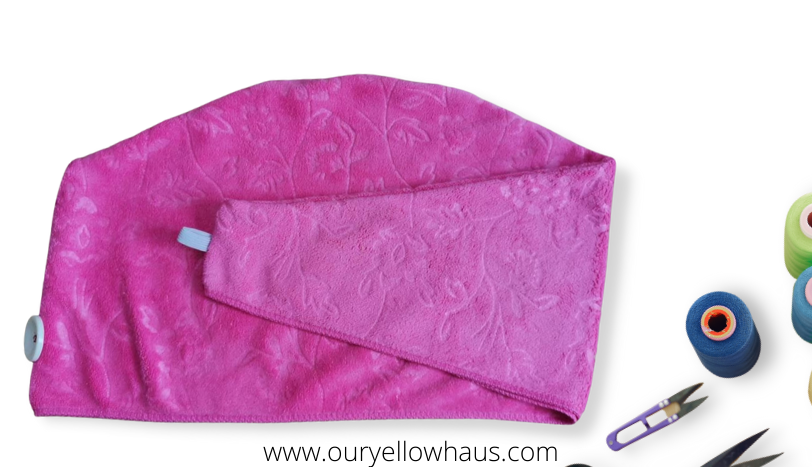
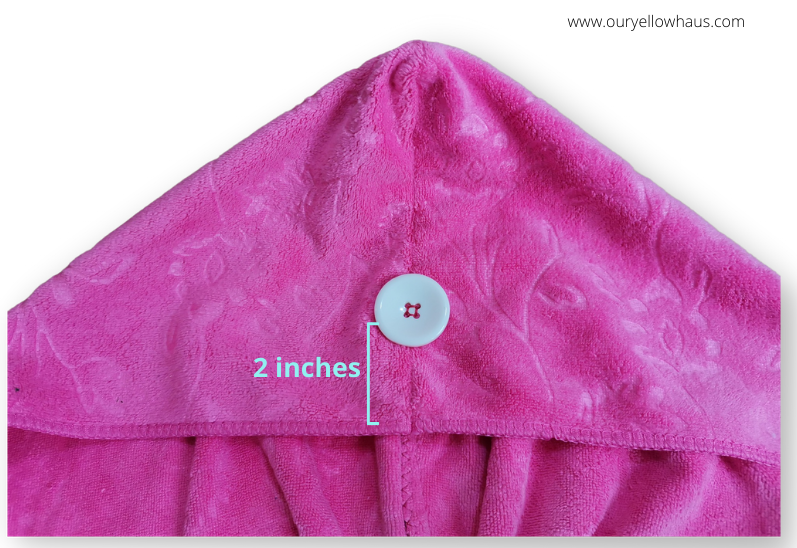
An then, turn your hair towel wrap right side out and sew a button in the middle, 2 inches away from the finished edge.
Finally, your super-easy hair towel wrap is done! All in all, the quick steps are as follows: measure and cut, zigzag and straight stitch, and sew the button on.

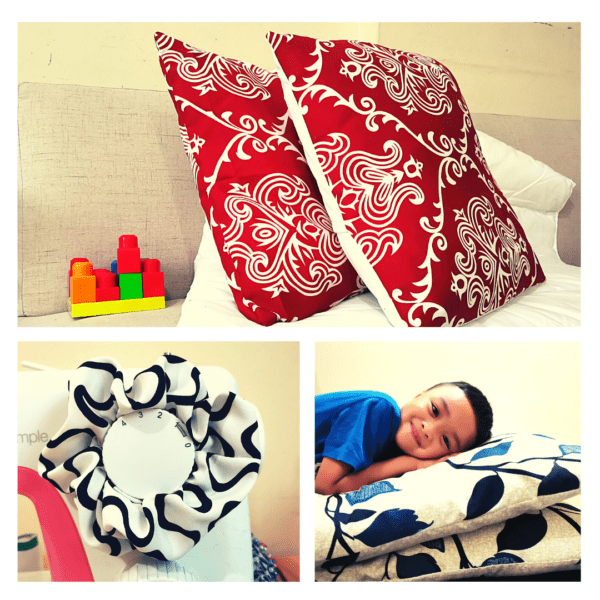
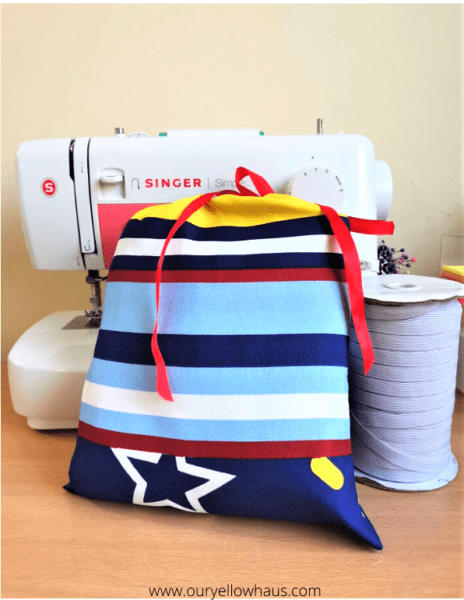
For more simple sewing projects, check our tutorials on how to make a scrunchie in 3 different ways, how to make an envelope closure pillow cover, how to sew a simple drawstring bag.
You can have variations of this sewing project. You may attach the elastic on the hoodie part and button on the tapered end. Or just the elastic without the button. Either way, you will use your hair towel wrap in the same way. Find out how to wear a towel hair wrap here.
I hope you enjoyed this simple project. Yes, this is a great gift to give to the special women in your life. Let me know about your sewing adventure by leaving a comment below.

Pingback: WHY SEWING IS GOOD FOR YOUR HEALTH AND LIFE - Our Yellow Haus